EAC Configuration Wizard
After installing EAC and starting the application for the first time, the EAC Configuration Wizard will be shown automatically. It is meant to help with the initial configuration of EAC by setting up the most essential options. You also can start the wizard later on by selecting EAC -> Configuration Wizard... from the EAC menu.
Please note that the configuration done by the wizard is not sufficient for perfect rips. To achieve this, a manual configuration has to be done after finishing the wizard. That is the reason why an experienced EAC user is likely to skip the wizard altogether and configure all settings on his own. But for a beginner this might be a good help for the initial configuration. In the next sections all steps of the wizard are covered in detail.
The screenshots were taken from a german Windows XP, so the buttons of the dialogs (Next, Finish, Cancel etc.) are german.
EAC Configuration Wizard
1. The first step is only the welcome screen of the wizard. Simply click Next.
2. On the second step you can choose which drives should be configured by the wizard. Just tick all checkboxes available so that all drives are configured.
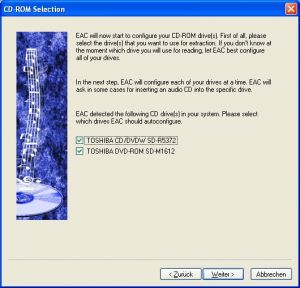
3. After selecting the drives to configure, the following steps (including step 7) repeat for all the drives. First of all you have to choose what is more important for you: accurate results or higher ripping speed. As we want the best results possible, make sure you select the option I prefer to have accurate results.
4. If your drive was found in the EAC feature databse, then a configuration is suggested in the 4th step. When you are sure, that these settings are correct you might use these suggested configuration. But it is generally a good idea to let EAC detect the drive features when running through the wizard. So tick the option I don't trust these values, detect the features for my drive and click Next.
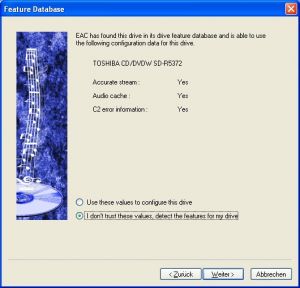
5. In the next step EAC informs you which drive is up to be tested. If you have not done this yet, insert a clean, scratch-free CD in your drive and click Next.
6. Now your drive's features are detected: accurate stream, C2 error info and caching (in this case, the caching of audio data is meant, not the caching of data in general, as this is supported by nearly all modern drives). A popup window will you inform about the process. During the drive is tested, do not produce load on your computer as this might alter the results.
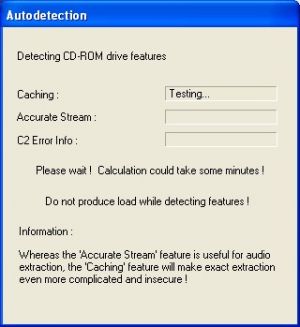
7. When the popup window disappears, the detected features of the drive are shown. Just confirm these by clicking Next.
8. After detecting the features of all the drives in your computer, EAC makes a suggestion about which drive should be used for best results. Note that this suggestions might be wrong and that another drive is still better for ripping (when having more drives installed on your computer). The reason for this is that EAC only looks at the features and considers accurate stream and C2 error info as good for ripping, but not the caching feature. So when two drives are installed on the computer and their features only differ in the caching capability, then it is most likely that the drive not supporting caching is suggested by EAC.
9. Next task is to configure the encoder to use with EAC. The next screen is just meant to give you some general information about the different compression options available. Just go on by clicking Next.
10. In this step you can choose the encoder EAC should use. You choice depends on many factors (e.g. if you want to use a lossless or lossy format), so no recommendation can be given here. Just note the different behavior of EAC by choosing different options: When selecting MP3 files (around 1.5 MB/minute) EAC will look for lame.exe before proceeding with the next steps. If you tick the option FLAC (around 6 MB/minute), EAC configures itself automatically because it is installed including a FLAC encoder. For the options WMA (around 1.5 MB/minute) and WMA lossless (around 6 MB/minute) the Microsoft WMA Encoder 9 has to be installed on your computer. You also can skip the encoder configuration right now by selecting nothing right now, I will configure it later manually and clicking Next
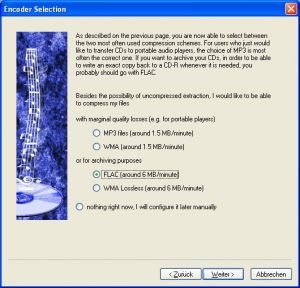
11. What the next step looks like depends on the choice of the encoder in the previous step. When FLAC was chosen, there is just a confirmation screen. In case of MP3, another information screen comes in between before the configuration is finished.
12. With the next step the access to freedb is configured. To gain access to this service, you have to specify an email address. If you don not want to enter your real email address, just enter a fake address. Just take care that it looks like a real email address, e.g. i.wont@tell.you
13. In the following step the configuration of filenames is done. Just choose an appropriate directorty/filename scheme which fits best for your needs.
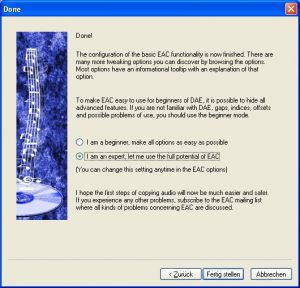
14. This is the last step in the configuration wizard. Here it is important that you select the option I am expert, let me use the full potential of EAC to gain access to every option in EAC, which is essential for perfect rips. Click Finish to leave the wizard.
AccurateRip
In general, the configuration of AccurateRip is started every time when a CD is inserted into a drive which has not been configured before and the CD is known to the AccurateRip database. When you run through all the steps of the wizard, then it is likely that a CD is still inserted in your drive after finishing the wizard, so an AccurateRip popup will be shown after the wizard. In this window the drive to configure and the expected offset will be shown.
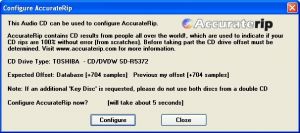
Just click Configure to configure AccurateRip and the offset option in EAC. After a few seconds a confirmation dialog will be shown with the calculated offset.

The next important steps
When perfect results are expected, we are not done after running through the EAC wizard, because many important options are not covered by the wizard. So the next steps would be the manual configuration of EAC. See the next articles dealing with the EAC configuration in detail.
