WMPTSE - How to change the plug-in properties
Software Needed
Installation
Note:
- This guide assumes that you have already downloaded and installed Windows Media Player and WMPTSE.
- This guide instructions and pictures are taken from WMP v9.0 but are valid for newer version.
Configuration
- Launch Windows Media Player.
- Make the menu visible by pressing Alt or cliking the Show menu bar button (or WMP v11.0 only, right click in WMP window)
- Open Tools menu
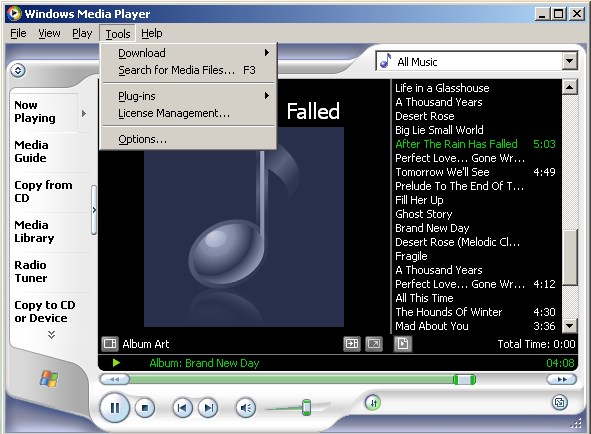
- Open the Plug-ins submenu and select Options...
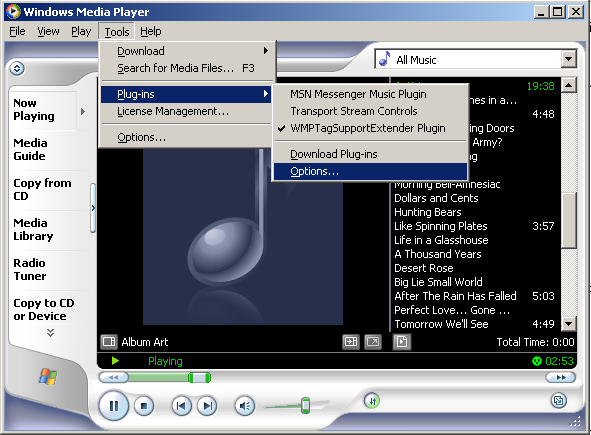
- In Category select Background. (if you have properly installed WMPTSE, it should be visible in the list on the right)
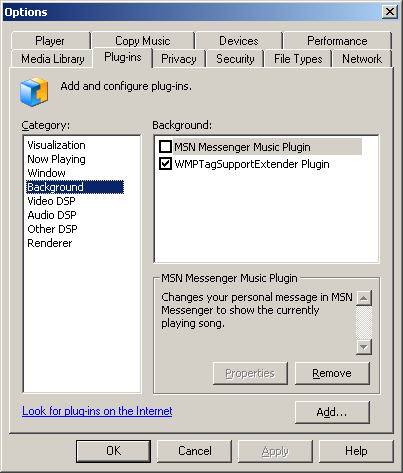
- On the left, select WMPTagSupportExtender Plugin (without unchecking it, click on his name) and click the Properties button
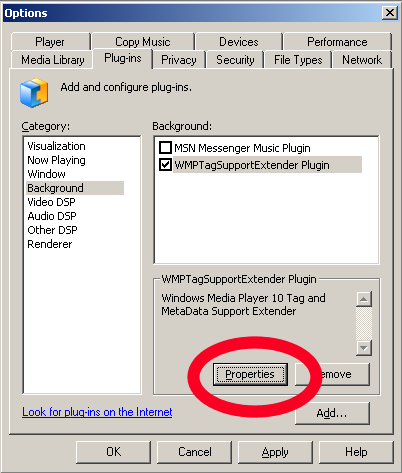
- The WMPTagSupport property box is displaying
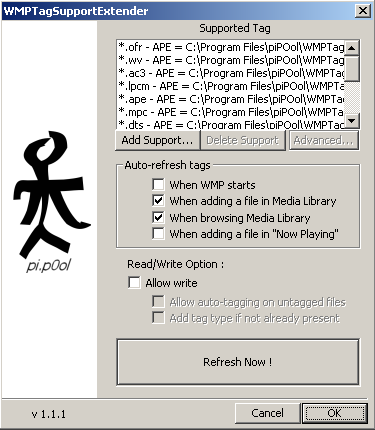
- When you have finished, click on the "OK" button to confirm your changes, or "Cancel" to keep the old ones...
Options
- Add Support (see the WMPTSE_-_How_to_add_support_for_a_filetype guide)
- Auto-refresh tags behavior :
* When WMP starts : a complete scan of you WMPTSE'd files will be done on WMP launch
* When adding a file in Media Library : when a file is added in the ML, its tag are scanned
* When browsing Media Library : each time you browse your library, a scan is done
* When adding a file in "Now Playing" : each time you add a file in the "Now Playing" play list
- Enable/disable Write : check the Allow write to be able to edit your files tags directly in WMP
* Allow auto-tagging on untagged files :
  will add a tag header for the format ("APEv2", "Vorbis") corresponding to the file type (".ape", ".ogg"),
  allowing edit of 'virgin' files
* Add tag type if not already present :
  will add the necessary tag type ("Album", "Artist", "Year") if they aren't already present in the file
- Refresh Now button : click here to force a complete scan of the library by hand
