OggdropXPd: Difference between revisions
mNo edit summary |
mNo edit summary |
||
| Line 1: | Line 1: | ||
{{Infobox Software | {{Infobox Software | ||
| name = OggDropXPd | | name = OggDropXPd | ||
| screenshot = [[image:Oggdropxpd-idle.PNG| | | screenshot = [[image:Oggdropxpd-idle.PNG|150px]] | ||
| caption = Graphical drag-n-drop frontend | | caption = Graphical drag-n-drop frontend | ||
| maintainer = John Edwards | | maintainer = John Edwards | ||
Revision as of 08:12, 19 November 2006
 Graphical drag-n-drop frontend | |
| Developer(s) | John Edwards |
| Release information | |
|---|---|
| Stable release | 1.8.7 |
| Compatibility | |
| Operating system | Windows |
| Additional information | |
| Use | Encoder/Decoder |
| License | GPL |
| Website | RareWares |
Introduction
John33's Ogg Vorbis encoder with a nice drag-and-drop interface.
Features
- Note: if you want to use Monkey's Audio, LPAC, WavPack, or OptimFrog as source files, you must provide the decoder yourself.
- Auto-tagging
- Renaming encoded files
- Setting of advanced encoder parameters
- Use of VorbisGain tags (ReplayGain for Vorbis) on decode
- Playlist (.pls) creation
- And more...
Quick start manual
Here is a short user manual on how to quickly employ OggDropXPd. This is not exhaustive; a far more exhaustive one is hosted at this site.
Installing
- Extract the ZIP file you download (see the Download section) to any folder.
- If you use the processor-optimized version (i.e. for P3/AMD or for P4), also copy libmmd81.dll into the same folder. You can get it at here.
- (Optional) Create a shortcut and copy it into your Start Menu, Desktop, QuickLaunch bar, etc.
- If you want support for encoding from lossless file (other than FLAC support which is built-in), extract the proper decoders in the same folder. You can get them at RareWares.
Configuring for Encoding
Note: All ScreenCaps taken from OggDropXPd v1.8.7
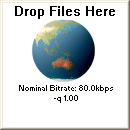
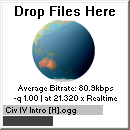
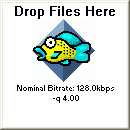
- Start OggDropXPd. The small Drop Target window will open (the right one is for Lancer OggDropXPd):
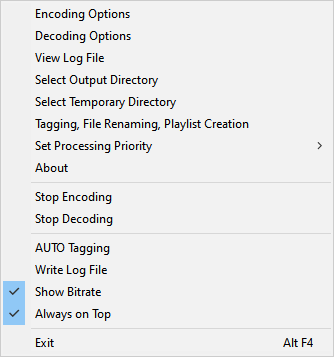
- Right-click on the small window. The following menu will be displayed:
- Click on a menu item to change the options. Menu items relevant for Encoding are described below.
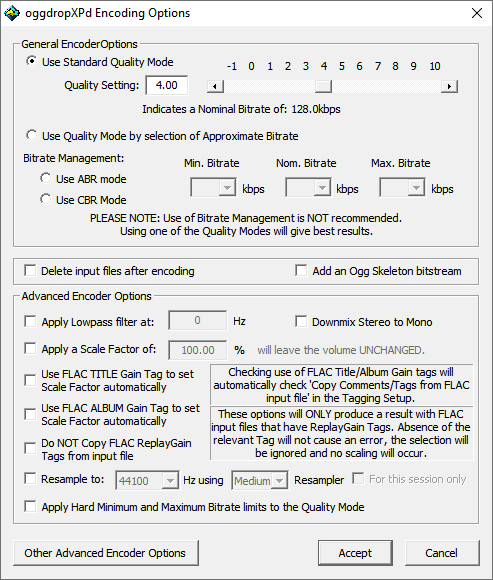
Encoding Options
This is used to configure the Vorbis Encoder
- General EncoderOptions
- This is where you choose the quality of the encoded file.
- Use Standard Quality Mode -- Recommended
- This ensures the highest quality, although you cannot exactly determine the bitrate.
- You can either type the exact -q value in the textbox, or drag the slider. Higher -q value gives better quality at the expense of larger file size.
- For some guidelines on what -q value to use, check out the Recommended Ogg Vorbis page.
- Use Quality Mode by selection of Approximate Bitrate
- Sometimes you need to encode files at a certain bitrate, e.g. for streaming. Choose this and specify the approximate bitrate you're trying to get.
- Bitrate management
- Although these two radio-buttons seem to be subsets of the previous option, they stand on their own, actually. i.e choosing either one of these two unselects the top 2 options.
- The following two options are not recommended, as they tend to sacrifice quality.
- Use ABR mode, here you can limit the minimum bitrate (may cause size bloat), maximum bitrate (may reduce quality on 'difficult' songs), and the nominal bitrate (affects quality if too low)
- Use CBR mode. Here you just specify the bitrate you want.
- Delete input files after encoding
- Self-explanatory. However, if you do not have the original source (e.g. CD), then it is recommended to uncheck this option. Just in case you need to re-encode, you will still have the source.
- Advanced Encoder Options
- For QuickStarting, you can leave these options unchecked.
- Other Advanced Encoder Options
- For QuickStarting, leave this button alone.
Select Output Directory
This is used to configure where the encoded file will be placed.
- Same as Input Directory
- The resulting .ogg file will be placed in the same directory as the source file. This is the default after installation.
- For the purposes of this QuickStart, choose this option.
- Set Other Output Directory - THIS SESSION ONLY
- You can specify in where to put the resulting .ogg file by clicking on the "..." button. However, if you close OggDropXPd and restart it later, the setting will revert back to "Same as Input Directory."
- Set Other Output Directory - AS DEFAULT
- Same as above, but your specified directory will be used for later sessions also.
Select Temporary Directory
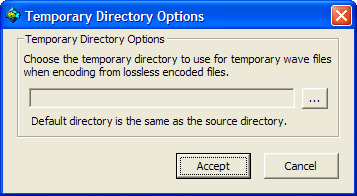
If you use the lossless source files of the formats .ape, .pac, .wv, .ofr, or .ofs, then this is where you store the temporary uncompressed .wav file.
This dialog box should be self-explanatory.
Other Settings
- Uncheck AUTO Tagging
- Check: Write Log File, Show Bit Rate, Always On Top
Encoding!
Drag and drop the file to be encoded from Windows Explorer onto the OggDropXPd droptarget window, and wait. The logo will spin while it is encoding: (Image capture of Lancer OggDropXPd)
There are 4 information shown while encoding, under the spinning logo:
- Last granule bitrate
- Current setting | encoding speed (i.e. x of real time)
- The lighter bar indicates the progress for the currently encoded file
- The darker bar indicates the total progress (i.e. when you dropped more than one source file onto OggDropXPd)
When the logo stops spinning... you're done! The resulting .ogg file can be found in the same directory as the source file.
Thus concludes OggDropXPd QuickStart manual for encoding.
Download
You can download the latest version from Vorbis page at RareWares.
A highly-optimized version is also available at the Ogg Vorbis Acceleration Project, with the codename of Lancer.
